该文记录音视频入门学习。
音视频服务器篇
1. 介绍
市面上优秀的流媒体服务器解决方案有很多,比如 SRS,Red5,EasyDarwin,nginx-rtmp,live555,mediasoup 等等。
2. nginx-rtmp 的部署
主要介绍下使用 nginx-rtmp 来部署一套流媒体服务器,并用 FFmpeg 来推流,Pot Player 来拉流。
2.1. 环境
Ubuntu20.04nginx-1.24.0nginx-rtmp-module-1.2.2
2.2. 下载 nginx 和 nginx-rtmp-module
1
2
3
4
5
6
7
| # nginx
https://github.com/nginx/nginx
https://nginx.org/en/download.html
# nginx-rtmp-module
https://github.com/arut/nginx-rtmp-module
https://github.com/arut/nginx-rtmp-module/tags
|
我是将安装包放置到 /home/august/work/ 目录下(这个可以自定义放置)。
2.3. 解压压缩包
1
2
3
4
5
6
| # 进入安装包目录
cd /home/august/work
# 解压
tar xvf nginx-1.24.0.tar.gz
unzip nginx-rtmp-module-1.2.2.zip
|
2.4. 编译 nginx
1
2
3
4
5
6
7
8
9
| # 进入 nginx 目录
cd nginx-1.24.0
# 设置安装目录、依赖模块(最好使用绝对路径,不然后面执行程序时相对路径出现问题)
./configure --prefix=/home/august/work/nginx-1.24.0/build --add-module=/home/august/work/nginx-rtmp-module-1.2.2
# 编译(j 后面数字表示多线程编译)
make -j4
# 安装
make install
|
2.5. config过程中错误及错误处理
如果 Ubuntu20.04 是新安装的话,极有可能缺啥以下依赖
1
2
3
| error: ./configure: error: the HTTP rewrite module requires the PCRE library.
error: ./configure: error: SSL modules require the OpenSSL library.
error: ./configure: error: the HTTP gzip module requires the zlib library.
|
安装缺少依赖即可
1
2
3
4
5
6
7
8
| # 软件更新
sudo apt-get update
sudo apt-get upgrade
# 安装依赖
sudo apt-get install libpcre3 libpcre3-dev
sudo apt-get install openssl libssl-dev
sudo apt-get install zlib1g-dev
|
2.6. 配置文件
安装成功后可以看到 nginx 服务和相关配置在 /home/august/work/nginx-1.24.0/build 中,我们需要修改 ./build/conf/nginx.conf
1
| vim ./build/conf/nginx.conf
|
在文件末尾加上以下配置
1
2
3
4
5
6
7
8
9
10
11
12
13
14
15
16
17
18
19
20
21
22
23
24
| rtmp {
server {
listen 1935;
chunk_size 4096;
# live on
application rtmp_live {
live on;
# hls on; # 这个参数把直播服务器改造成实时回放服务器。
# wait_key on; # 对视频切片进行保护,这样就不会产生马赛克了。
# hls_path ./sbin/html; # 切片视频文件存放位置。
# hls_fragment 10s; # 每个视频切片的时长。
# hls_playlist_length 60s; # 总共可以回看的时间,这里设置的是1分钟。
# hls_continuous on; # 连续模式。
# hls_cleanup on; # 对多余的切片进行删除。
# hls_nested on; # 嵌套模式。
}
# play videos
application rtmp_play {
play /home/august/work/videos; # 点播视频存放路径(建议还是绝对路径)
}
}
}
|
2.7. 启动 nginx
1
2
3
4
| # 绝对路径
sudo /home/august/work/nginx-1.24.0/build/sbin/nginx
# 相对路径(因为编译配置都是绝对路径,所以启动相对路径没影响;如果配置相对路径,出现问题大概率是路径问题)
|
2.8. ffmpeg推流
1
2
3
4
5
6
7
8
| # -i 推流文件名称
# -vcodec libx264 视频
# -acodec aac 音频
# -f flv rtmp://[ip]:[port]/[type]/[stream_name]
# ip,port服务器地址和的上述配置监听端口
# type根据上述配置决定,rtmp_live是直播,rtmp_play是点播
# name推流名称
ffmpeg -i SampleVideo_1280x720_30mb.flv -vcodec libx264 -acodec aac -f flv rtmp://192.168.199.129:1935/rtmp_live/mystream
|
2.9. Pot Player 拉流(直播、点播)
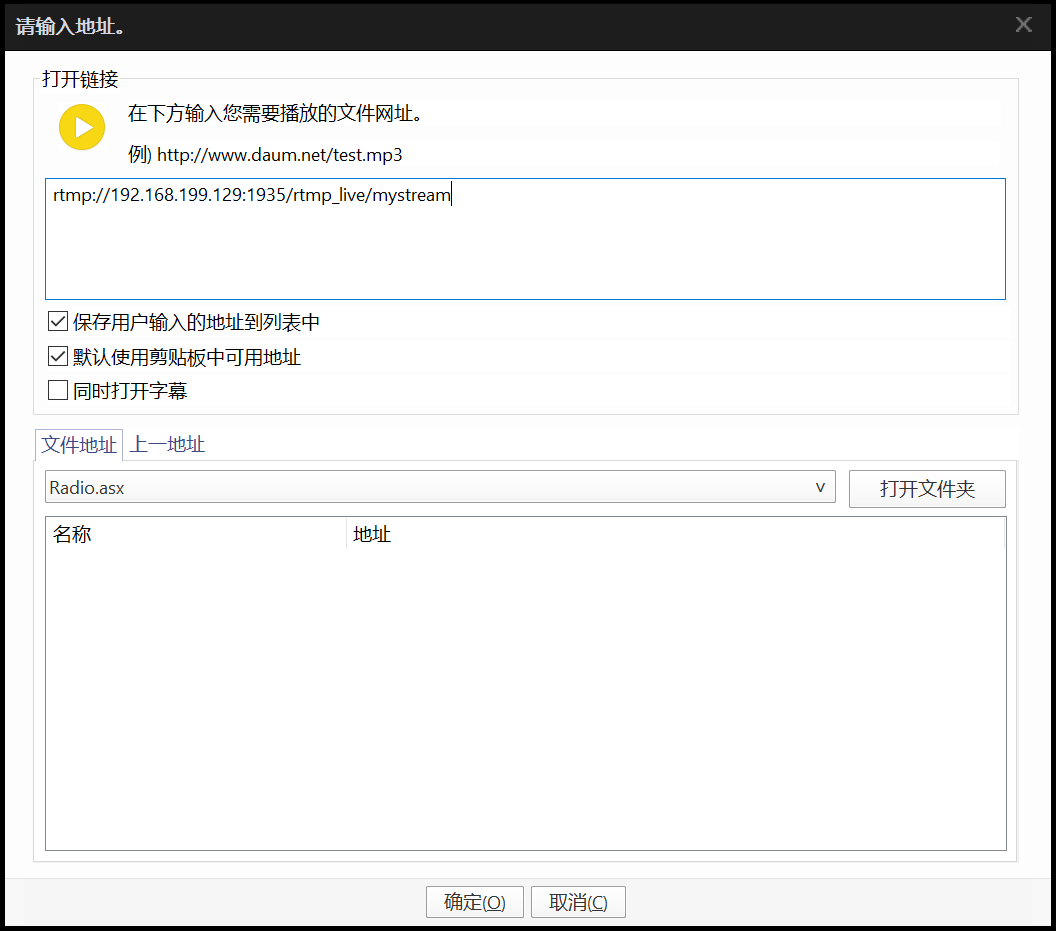
打开 Pot Player 在主界面依次点击右键 ==》 打开 ==》 打开链接(或者快捷键 Ctrl + U),在打开的界面的打开链接中输入对应推流地址。
1
2
3
4
5
| # 直播
rtmp://192.168.199.129:1935/rtmp_live/mystream
# 点播
rtmp://192.168.199.129:1935/rtmp_play/SampleVideo_1280x720_30mb.flv
|
3. SRS 的部署
本篇文章,我们详细介绍下使用 SRS 来部署一套流媒体服务器,并用 FFmpeg 来推流,Pot Player 来拉流。
3.1. 环境
Ubuntu20.04srs-server-5.0-b3
3.2. 下载 srs
1
2
| https://github.com/ossrs/srs
https://github.com/ossrs/srs/releases
|
我是将安装包放置到 /home/august/work/ 目录下(这个可以自定义放置)。
3.3. 解压压缩包
1
| tar xvf srs-server-5.0-b3.tar.gz
|
3.4. 编译 srs
1
2
3
4
5
6
7
8
9
| # 进入 srs 目录
cd srs-server-5.0-b3/trunk/
# 设置安装目录、依赖模块(最好使用绝对路径,不然后面执行程序时相对路径出现问题)
./configure --prefix=/home/august/work/srs-server-5.0-b3/trunk/build --full
# 编译(j 后面数字表示多线程编译)
make -j4
# 安装
make install
|
3.5. config过程中错误及错误处理
3.5.1. 问题一
1
2
3
4
5
| Please install tclsh by:
apt install -y tclsh
Please install cmake by:
apt install -y cmake
|
缺少依赖 tclsh 和 cmake
1
2
| sudo apt install -y tclsh
sudo apt install -y cmake
|
3.5.2. 问题二
1
2
3
| Building opus-1.3.1.
./auto/depends.sh: line 494: autoreconf: command not found
Build opus-1.3.1 failed.
|
缺少依赖 autoconf automake libtool
1
| sudo apt-get install autoconf automake libtool
|
3.6. 配置文件
安装成功后可以看到 srs 服务和相关配置在 /home/august/work/srs-server-5.0-b3/trunk/build 中。
原来的配置文件是 conf/srs.conf, SRS 可以通过参数选择配置文件启动服务,所以我们可以增加自定义配置文件 ./build/conf/my_hls.conf,因为官方文档也是使用相对路径,所以沿用相对路径
1
2
3
4
5
| # 进入 build 目录
cd build
# 编辑(添加)文件
vim conf/my_hls.conf
|
在新文件里添加以下内容
1
2
3
4
5
6
7
8
9
10
11
12
13
14
15
16
17
18
19
20
21
22
23
24
25
26
27
28
29
30
| listen 1935;
max_connections 1000;
daemon on;
srs_log_tank file;
srs_log_level error;
srs_log_file ./objs/srs.log;
http_server {
enabled on;
listen 8081;
dir ./objs/nginx/html;
}
vhost __defaultVhost__ {
hls {
enabled on;
hls_fragment 10;
hls_window 60;
hls_path ./objs/nginx/html;
hls_m3u8_file [app]/[stream].m3u8;
hls_ts_file [app]/[stream]-[seq].ts;
hls_cleanup on;
hls_dispose 30;
hls_on_error continue;
hls_storage disk;
hls_wait_keyframe on;
hls_acodec aac;
hls_vcodec h264;
}
}
|
3.7. 启动 srs
因为配置文件使用相对路径所以必须在 安装目录层级启动
1
2
| # 使用相对路径
sudo ./objs/srs -c ./conf/my_hls.conf
|
3.8. ffmpeg推流
1
2
3
4
5
6
7
8
| # -i 推流文件名称
# -vcodec libx264 视频
# -acodec aac 音频
# -f flv rtmp://[ip]:[port]/[file_name]/[ts_name]
# ip,port 服务器地址和的上述配置监听端口
# file_name ./objs/nginx/html/ 文件下会创建目录
# ts_name ts和m3u8文件前缀
ffmpeg -i SampleVideo_1280x720_30mb.mp4 -vcodec libx264 -acodec aac -f flv rtmp://192.168.199.129:1935/live/index
|
生成的 m3u8 和 ts 文件路径,在推流时滚动式生成,推流结束后清理
1
| /home/august/work/srs-server-5.0-b3/trunk/build/objs/nginx/html/live
|
3.9. Pot Player 拉流(rtmp、http)
1
2
| rtmp://192.168.199.129:1935/live/index
http://192.168.199.129:8081/live/index.m3u8
|
4. live555 的部署
4.1. 环境
Ubuntu20.04live.2023.07.24
4.2. 下载 srs
1
2
| https://github.com/rgaufman/live555
http://www.live555.com/liveMedia/public/
|
我是将安装包放置到 /home/august/work/ 目录下(这个可以自定义放置)。
4.3. 解压压缩包
1
| tar xvf live.2023.07.24.tar.gz
|
4.4. 编译 srs
1
2
3
4
5
6
7
| # 进入 srs 目录
cd live
# 设置编译环境
./genMakefiles linux-64bit
# 编译(j 后面数字表示多线程编译)
make -j4
|
4.5. 编译问题
1
2
3
4
5
6
7
| BasicTaskScheduler.cpp: In member function ‘virtual void BasicTaskScheduler::SingleStep(unsigned int)’:
BasicTaskScheduler.cpp:191:40: error: ‘struct std::atomic_flag’ has no member named ‘test’
191 | if (fTriggersAwaitingHandling[i].test()) {
| ^~~~
make[1]: *** [Makefile:41: BasicTaskScheduler.o] Error 1
make[1]: Leaving directory '/home/august/work/live/BasicUsageEnvironment'
make: *** [Makefile:38: all] Error 2
|
原因是下载的版本太新, struct std::atomic_flag 需要 C++20 才能支持,所以编译不过,需要添加编译 -DNO_STD_LIB 来解决,根据不同编译环境修改不同的配置文件 Ubuntu20.04 修改的是 config.linux-64bit
1
2
3
4
5
6
7
| # 修改读写权,原来是只读
sduo chmod 777 config.linux-64bit
# 修改文件
sudo vim config.linux-64bit
# 在第一行最后添加 -DNO_STD_LIB
COMPILE_OPTS = $(INCLUDES) -m64 -fPIC -I/usr/local/include -I. -O2 -DSOCKLEN_T=socklen_t -D_LARGEFILE_SOURCE=1 -D_FILE_OFFSET_BITS=64 -DNO_STD_LIB
|
4.6. 启动 live555
普通启动有端口号, sudo 启动没有端口号。
1
2
| cd mediaServer
./live555MediaServer
|
4.7. 上传视频
将视频文件上传至 live/mediaServer 目录下
4.8. Pot Player 拉流(rtsp)
拷贝 live555 生成的 url + filename
1
| rtsp://192.168.199.129:8554/SampleVideo_1280x720_30mb.mkv
|
参考
